
Paper for Adult Coloring: The Right Paper for Every Medium (and How to Stop Bleed-Through for Good)
Markers, colored pencils, gel pens or watercolor pencils: the paper under your hand decides how they behave. Here’s how to tell what a page can take, and what to do when it can’t.

Affiliate Disclosure
This page contains affiliate links. As an Amazon Associate I earn from qualifying purchases, so if you buy through a link I may earn a commission at no extra cost to you. Read my full Disclosure Statement.
IN SUMMARY
- Paper decides how much ink soaks in, how well color grips, and how the page copes with water. Those three jobs cause most coloring problems.
- Two things to check before you buy: weight (gsm) and texture (tooth). The table below shows what each medium wants.
- There’s a free fix for books you already own. Slide a backing sheet behind the page.
- Single-sided books remove bleed-through. Double-sided books suit colored pencils best.
- You can test any paper in two minutes with your own supplies.
Jump to a section:
If your coloring pages keep going wrong, look at the paper before you blame your pens, your pencils or yourself.
Here are four problems that look unrelated:
- Markers soak through the page and stain the one behind it.
- Colored pencils stay flat and patchy, however many layers you add.
- Gel pens skip, then smear.
- Watercolor pencils make the page ripple and wrinkle as soon as it gets wet.
All four have the same cause. The paper wasn’t the right match for what went on top of it.
That’s good news, because paper is easy to check once you know what to look for. This page explains it in plain words, gives you a two-minute test to run with your own supplies, and shows which paper suits which medium. A better match can change how the very same pencils look.
What you’ll learn:
- What paper is made of, and why that decides how color behaves
- A two-minute test to try on any paper with your own supplies
- What gsm and tooth mean, in plain words
- Which paper suits markers, gel pens, colored pencils and watercolor pencils, with product picks next to each tip
I haven’t personally tested every product shown on this page. The picks come from what other adult colorists consistently recommend across Facebook groups, Reddit threads and product reviews, plus a few things I’ve genuinely tried myself. Some product links are affiliate links, so I may earn a small commission at no extra cost to you.
Why Paper Makes Such a Difference
What Paper Is Made Of
Paper is a mat of tiny plant fibers, pressed flat and dried. Under a magnifying glass you’d see the fibers criss-crossing, with small gaps between them.
Two things change how that mat behaves. One is how thick and dense it is. The other is whether it has a coating or a finish on top. Thin, uncoated paper lets liquid sink into the gaps. Thick, smooth or coated paper keeps liquid nearer the surface.
Three Jobs Your Paper Does
- Paper decides how much ink soaks in. Thin paper drinks marker ink and passes it to the next page. Thick or coated paper holds the ink closer to the top.
- Paper decides how well color grips. A pencil leaves pigment where the paper’s tiny bumps catch it. That texture is called tooth. Very smooth paper has few bumps, so the color has little to hold on to.
- Paper decides how it copes with water. Wet fibers swell. Thin paper swells unevenly and ripples. Thick watercolor paper has enough fibers to stay flat.
Same Coloring, Different Paper

The picture shows the idea. Smooth marker paper lets ink glide, toothy paper lets pencil layers build, and thick watercolor paper stays flat under a wet brush. Each one is the right paper for one job.
Try It Yourself: The Two-Minute Paper Test
Reading about paper is one thing. Seeing it is better. You only need your own supplies and a page you don’t mind spoiling, such as the inside back cover of a book or a spare sheet.
- Marker test. Draw a thick patch, wait a minute, then turn the page over. Ink showing through means the paper is too thin for that marker.
- Pencil test. Color a patch with light pressure, then color over it twice more. If the color builds and deepens, the paper has enough tooth. If it stays flat and slippery, it doesn’t.
- Gel pen test. Draw a line, wait ten seconds, then brush it with a clean finger. A smear means that paper needs longer to dry, or a little more texture.
- Watercolor pencil test. Color a patch, then stroke a wet brush across it. A page that ripples or wrinkles is too thin for water.
Run the same test on two different papers and put them side by side. That’s the quickest way to see what paper is doing.
If you’ve colored for years, try the pencil test on a page from your usual book, then on a sheet of paper sold for colored pencils. You may find your pencils behave differently than you expected.
Paper for Adult Coloring at a Glance, by Medium
| Medium | Weight | Finish | Watch for |
|---|---|---|---|
| Markers & gel pens | 215–270gsm+ (80–100lb cover weight) | Smooth, coated | Thin, uncoated paper is the main cause of bleed-through |
| Colored pencils | Around 160gsm or more feels sturdy. Texture matters more than weight. | Some tooth (texture) | Very smooth paper limits layering. It suits fine detail. |
| Watercolor pencils | 300gsm+ (140lb) | Cold-press or mixed-media | Anything lighter ripples and wrinkles once wet |
gsm means grams per square meter. Picture a sheet of paper one meter by one meter and weigh it: the grams are its gsm, so a bigger number means thicker, heavier paper. Ordinary printer paper is about 75–80gsm. Pound (lb) numbers mean different things for different types of paper, so go by gsm when you can.
Paper words, explained
- Tooth is the paper’s texture. It’s the tiny bumps that grab pigment. You’ll also see it called grain or finish. Markers want almost none. Gel pens and colored pencils want some.
- Vellum finish is usually a medium texture. It sits between smooth and rough. It has nothing to do with vellum paper, the see-through sheets used for tracing.
- Bristol is several thin sheets glued together. That makes it stiff and strong. It comes in smooth and vellum finishes.
- Hot press and cold press are watercolor paper finishes. Hot press is smooth. Cold press has a slight texture that varies by brand.
- Brands label textures differently. One medium texture can appear as “medium tooth”, “medium grain”, “vellum” or, on some watercolor paper, “cold press”. The table below lists the common labels.
Reading texture labels
| Texture | Labels you’ll see | Good for | Examples |
|---|---|---|---|
| Smooth | “smooth”, “plate”, “hot press” | Fine detail, markers and gel pens. Limited layering. | Strathmore 300 Series Bristol, Smooth surface. Hot-press watercolor paper. |
| Medium | “medium”, “medium tooth”, “medium grain”, “vellum”, sometimes “cold press” | Most colored pencil work, and the best place to start. | Strathmore 400 Series Colored Pencil pad (listed as “Surface: Medium”). Strathmore 400 Series Drawing, Medium Surface. Daler-Rowney Medium Grain drawing pads. Strathmore 300 Series Bristol, Vellum surface. |
| Rough | “rough”, “coarse”, “heavy tooth” | Many layers and wet media. Fine detail is harder. | Rough watercolor paper. |
Brands don’t follow one standard. Cold press ranges from fairly smooth to quite rough, and a few sellers use “vellum” for smoother paper. If a listing doesn’t say, treat the texture as unknown.
Texture is hard to judge from a product photo. These checks help:
- Look for a surface line in the listing. Many pads state it, such as “Surface: Medium” or “medium grain”.
- Read the description for “toothy” or “vellum surface”. Colored pencil pads often use these words.
- Search the reviews for “layers” or “layering”. Colorists who build up color on the paper usually say how it behaved.
- Feel a sample if you can. Smooth paper feels slick. Medium tooth has a slight grain under your fingertip.
- Buy one small pad first. Test it with your own pencils before you order a big stack.
Fix Bleed-Through Right Now
Bleed-through happens when ink soaks all the way through thin paper and shows on the page behind. You don’t have to buy anything to protect a book you already own. Try these in order.
Slide a backing sheet behind the page
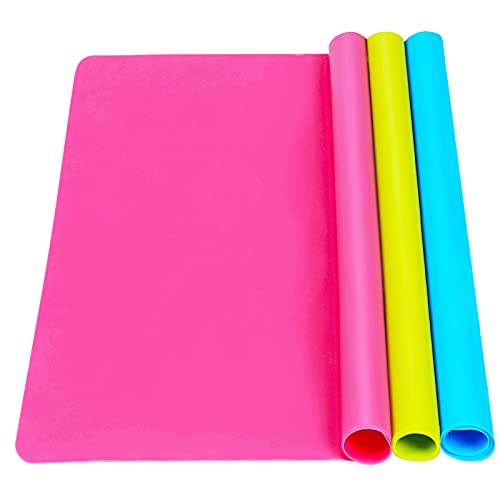
Thick cardboard, a spare book cover, a silicone craft mat or a stack of scrap paper all work. Anything solid between the page you’re coloring and the next one will do. Your own page still takes the ink, and every page behind it stays clean. The picks below are made for the job if you’d rather buy one.
-
 View on Amazon$5.99
We earn commission if you make a purchase at no additional cost to you. See Disclosure Statement for further details....
10/21/2026 01:42 pm GMT -
View on Amazon
$7.99$6.39We earn commission if you make a purchase at no additional cost to you. See Disclosure Statement for further details....
10/21/2026 01:42 pm GMT

Switch medium for that page
If a book still bleeds, put the markers away for that book and use colored pencils on it. Nothing is lost. The design is still there to color.
Remove or duplicate the page before you start
Tear the page out carefully along the binding, or scan it and print it on heavier paper. Either way, you’re coloring on paper that suits the job.
If you’re printing at home, use the right cardstock
Printer paper bleeds through with markers almost at once. Cardstock of about 176–270gsm (65–100lb cover) holds up much better. Check your printer’s maximum paper weight first, because some home inkjets jam above about 270gsm. The picks below are cardstock packs that suit home printing.
-
View on Amazon$10.63
We earn commission if you make a purchase at no additional cost to you. See Disclosure Statement for further details....
10/19/2026 10:38 am GMT -
View on Amazon$5.99
We earn commission if you make a purchase at no additional cost to you. See Disclosure Statement for further details....
10/19/2026 10:47 am GMT


💡 Pro Tip
A silicone craft mat does double duty as a backing sheet and a table protector, worth having even if bleed-through isn’t your main problem.

Paper by Medium
Each product box in this section pairs one adult coloring book example with one ream of printer paper that suits that medium. Pick the book if you’d like a ready-made page, or the paper if you want to print your own.
Markers & Gel Pens
Markers and gel pens both like a smooth surface, but they act differently on it, so paper made for one may not suit the other.
- Alcohol markers soak through thin paper fast. Weight matters most here.
- Bleed-proof paper is made for markers. Its surface is smooth with very little tooth, so the ink sits on top and colors blend instead of soaking in.
- Paper that isn’t made for markers drinks the ink. Watercolor paper does this, and the colors come out dull and spotty.
- Gel pens like a little texture. Gel ink dries slowly and can smear or skip on paper that’s too smooth. A very light tooth helps a gel pen, though it would hurt a marker.
-
View on Amazon$9.99
We earn commission if you make a purchase at no additional cost to you. See Disclosure Statement for further details....
10/21/2026 11:41 am GMT -
View on Amazon$14.99
We earn commission if you make a purchase at no additional cost to you. See Disclosure Statement for further details....
10/19/2026 11:20 am GMT

Colored Pencils
Colored pencils need tooth, the tiny bumps that grab pigment so color can build in layers.
- Smooth marker paper resists pencil. Pigment slides over it like paint over glass.
- Printer paper shows the problem. It has almost no tooth, so pencil color slides around instead of building up.
- Wax and oil pencils use the same paper. Prismacolor and Caran d’Ache Luminance are wax-based. Faber-Castell Polychromos is oil-based. Paper with some tooth suits both. After heavy layering, wax pencils can leave a cloudy film called wax bloom.
- Medium tooth is the best place to start. Rough paper grips color for many layers but makes fine detail harder. Smooth paper gives crisp detail but limits layering. Medium sits in between.
- Vellum finish is one good choice. Drawing paper, mixed media paper and lightly textured cardstock work too. Paper sold for colored pencils is the easiest buy if you’re unsure.
Not sure what a listing’s texture words mean? Paper words, explained, near the top of this page, decodes the common labels and shows how to check a listing.
-
View on Amazon
$14.95$9.79We earn commission if you make a purchase at no additional cost to you. See Disclosure Statement for further details....
10/21/2026 04:41 am GMT -
View on Amazon
$9.39$8.29We earn commission if you make a purchase at no additional cost to you. See Disclosure Statement for further details....
10/19/2026 11:29 am GMT


Watercolor Pencils
This is the one medium where weight really counts. Wet fibers swell, and thin paper can’t stay flat while they do. Standard coloring book paper (about 90–120gsm) ripples and wrinkles as soon as a wet brush touches it. You need at least 300gsm (140lb), ideally cold-press watercolor paper or a mixed-media pad made for water.
Cold press and hot press are the two finishes you’ll see on watercolor paper. Cold press has a slightly rough surface that holds water well, which is what you want when you wet pencil pigment with a brush. Hot press is rolled smooth, closer to Bristol, and suits fine detail better than heavy water. It also works well with regular dry colored pencils. For watercolor pencils, cold press is the safer default.
-
View on Amazon$7.99
We earn commission if you make a purchase at no additional cost to you. See Disclosure Statement for further details....
10/20/2026 04:46 am GMT -
View on Amazon$22.70
We earn commission if you make a purchase at no additional cost to you. See Disclosure Statement for further details....
10/20/2026 04:44 am GMT


Single-Sided vs. Double-Sided Books
A single-sided book leaves the back of every page blank, so bleed-through has nothing to spoil. A double-sided book puts a design on both sides.
Single-Sided
- Blank back, so bleed-through has nothing to ruin
- Fewer pages per book for the same price
- The safer choice if you color with markers
Double-Sided
- More pages per book, better value
- Works fine with lighter media like colored pencils
- Riskier with markers unless the paper is unusually heavy
If you color with markers, a single-sided book is the safest buy. This one is sold as bleed-resistant and comes with protective sheets. That’s the seller’s description, so test a page before you color the whole book.

We earn commission if you make a purchase at no additional cost to you. See Disclosure Statement for further details....
Frequently Asked Questions
It depends on what you color with. Markers and gel pens like smooth, coated paper of about 215–270gsm or more (80–100lb cover). Colored pencils like paper with some tooth, and about 160gsm or more feels sturdy. Watercolor pencils need 300gsm (140lb) or more. There’s no single best paper, only the best match for your medium.
Most adult coloring books use paper of about 90–120gsm (60–80lb text weight). That suits colored pencils but is risky for alcohol markers. Books made for markers are usually thicker. Look for the weight in the listing, and for words like “bleed-resistant” or “marker-friendly”. Treat those words as the seller’s claim and test a page before you start.
Neither is better. They need different paper. Markers need thick, smooth paper so the ink stays near the top. Colored pencils need tooth so color can build. If you use both, look for mixed-media paper, or keep one book for each.
Acrylic (paint) markers usually bleed through less than alcohol markers, but they can still soak through thin paper. Test on a spare page first, and keep a backing sheet behind the page anyway.
Single-sided books remove bleed-through, because the back of each page is blank. Double-sided books cost less and give you more pages, but they suit lighter media like colored pencils. If you color with markers, single-sided is worth the extra cost.
Often the paper is too smooth. Tooth is what lets pigment build in layers. Smooth, coated paper made for markers resists colored pencil the way glass resists paint. Look for paper with some tooth, such as drawing paper, mixed media paper, vellum finish or paper sold for colored pencils.
Wet fibers swell, and thin paper can’t stay flat while they do. Anything under about 300gsm (140lb) will ripple once you wet the pencil with a brush. Cold-press watercolor paper or a heavy mixed-media pad stays flatter. Standard coloring book paper isn’t made for this.
Paper is one cause, but often not the only one. Very smooth paper makes gel ink smear easily, and pressing hard or holding the pen at a steep angle adds to it. Try paper with a little more texture, press lightly and give the ink time to dry.
Slide something solid behind the page you’re coloring: thick cardboard, a spare book cover, a silicone craft mat or a stack of scrap paper. It won’t stop ink soaking into that page, but it protects everything underneath. It’s the fastest fix and costs nothing extra.
Anything solid and a bit thick: cardboard, a cutting mat, a marker-blending pad, or the book’s own back cover folded forward. Some colorists use a silicone craft mat because it protects the table too. You just need a barrier between the wet ink and the next page.
If you switch between the two, look for paper called “mixed media” or “marker and pencil compatible”, usually 270gsm (100lb) or heavier with a light texture. It won’t beat paper made for one medium, but it saves you keeping two books.
Cardstock of about 176–270gsm (65–100lb cover) prints cleanly and handles markers far better than printer paper, which bleeds through almost at once. Check your printer’s maximum paper weight first, because some home inkjets jam above about 270gsm. A basic office-supply cardstock pack is enough to start.
Budget books use thin, uncoated paper to keep the price down. That doesn’t mean the designs are poor. You can still fix it without a new book: use a backing sheet, color that book with pencils, or reprint the pages you want on heavier paper.
For some colorists, yes. Cream or ivory paper can feel gentler on the eyes than bright white under strong light. Dark papers suit few coloring books, because pre-printed books aren’t made on black or dark stock. Lighting matters too, and our Adult Coloring Safety guide covers it.
Going Further
Warning Signs Before You Buy
⚠ Signs Your Paper Will Bleed
- Listed weight under about 120gsm (80lb text weight)
- No mention of “coated”, “bleed-resistant” or “marker-friendly”
- Reviews that say “see-through” or “thin”
- Double-sided with no weight listed at all
✓ Signs Paper Will Hold Up
- A weight stated clearly and close to the range in the table above for your medium
- Sold for markers, alcohol ink or mixed media
- Single-sided, or double-sided with a clearly stated heavy weight
- Reviews that mention your own medium
Words like “bleed-proof” come from the seller. The two-minute test above checks them for you.
Getting More Out of Colored Pencil Paper
Once the paper’s tooth suits your pencils, layering matters as much as the paper. Light, repeated layers build richer color than pressing hard on the first pass. Heavy pressure early flattens the tooth and leaves less texture for later layers to grip.
Printing at Home: Getting the Settings Right
Cardstock weight is only half of it. Check your printer’s “paper type” setting before you print. Choosing “cardstock” or “heavy” instead of “plain paper” tells the printer to feed more slowly and lay down more ink, which makes lines crisper on thick stock. Many printers also have a manual or rear feed slot for thick paper. If yours does, use it and feed one sheet at a time.
Acid-Free Paper for Pages You Want to Keep
Acid in cheap paper breaks down the fibers and turns pages yellow over time. If you plan to frame or keep finished pages, look for paper labeled acid-free.
A Note on Burnishing
Burnishing means pressing hard enough to fill in every speck of white. It works best on paper heavy enough to take the pressure without tearing. For the full technique, see our Blending, Shading, and Burnishing guide.
More to Explore
Related Tutorials
- Blending, Shading, and Burnishing: once your paper’s sorted, this covers the technique side of building rich, even color.
- Adult Coloring Book Styles: different styles suit different paper and mediums, worth reading before you buy your next book.
- Getting Started with Adult Coloring: if you’re just starting out, this covers the full supply list, paper included.
- Colored Pencils for Adult Coloring: a closer look at pencil choice, which pairs directly with the paper tooth question above.
- Markers for Adult Coloring: brand and type comparisons for the marker side of this guide.
External Resources
- Sarah Renae Clark, “Testing the BEST PAPER for Colored Pencils & Coloring Pages” (above): a hands-on video comparison, worth watching if you want to see paper tooth and bleed-through side by side.
- r/AdultColoring on Reddit: an active community for real, ongoing paper and bleed-through discussions from colorists working through the same problems this page covers.
Next time a page goes wrong, check the paper before you blame your pencils or yourself. Run the two-minute test on a spare sheet and you’ll see what the paper is doing.
If you’re still putting your first supply kit together, our Getting Started guide covers everything else you’ll want alongside the right paper.
Read the Getting Started Guide