
Getting Started with Adult Coloring:
Your Complete Beginner’s Guide
Enjoy relaxing coloring sessions right away instead of overthinking books, pencils, and techniques

- Start with just 3 supplies — a coloring book, 24–36 pencils, and a sharpener. Everything else can wait.
- Total cost: $20–30. Most beginners waste $50–100 on supplies they don’t actually need yet.
- Colored pencils are the only beginner-friendly medium — markers can wait at least 2–4 weeks.
- There’s one specific thing you shouldn’t do on your very first session — and it’s the mistake most beginners make immediately.
- After 1–2 weeks, you’ll know exactly which upgrades are worth your money — and the answer might surprise you.
- Your first page doesn’t need to look good. It just needs to happen.
Jump to a section:
If you’ve ever stood in an art supply aisle — or stared at an Amazon search results page — with no idea where to start, you’re not alone. Adult coloring looks simple until you’re faced with hundreds of books, pencil sets, markers, and accessories, and no clear guide on what a complete beginner actually needs. You worry about wasting money on the wrong supplies and feel stuck before you even colour your first page.
I started coloring in 2015 when I spotted an “Adult Coloring for Stress Relief” display in a shop. A few weeks later I bought a cheap pencil set from the discount shop and a couple of books from KMart — and I’ve never looked back.
I’ve since researched what hundreds of beginners wish they’d known before their first purchase, and the pattern is clear: most people overbuy. They spend $50–100 on supplies they barely touch because they didn’t understand what beginners actually use versus what looks impressive. The good news? You can start with a simple $20–30 setup and enjoy relaxing coloring sessions immediately.
There’s no “wrong” way to color. This guide helps you start with confidence, not perfection.
The 3 Essentials (Total: $20–30):
Nice to add later (once you know you enjoy coloring):
- A budget marker or fineliner set, to try a different medium ($10–20)
- Simple pencil case or roll ($5–10)
- Second coloring book in a different style ($8–12)
Time to first colored page: 15–30 minutes | Total budget: $20–30 | Skill required: None
- Professional artist pencils ($50–200 sets)
- Alcohol markers or brush pens (harder to control)
- Blending stumps, solvents, fixatives (advanced techniques)
- Huge pencil sets with 100+ colors (you’ll use 20–30 regularly)
Understanding Adult Coloring: What It Actually Is
Adult coloring means working with pre-printed designs — mandalas (circular, symmetrical designs), nature scenes, patterns, whimsical illustrations — and choosing colors to bring them to life. You’re not drawing or creating designs from scratch. The structure is provided; you add the color and make creative choices about technique and palette.
Why This Appeals to Beginners
No Artistic Skill Required
You don’t need to know how to draw. If you can hold a pencil and generally stay within lines (and even that’s optional), you can color. There’s zero pressure about artistic ability.
Low-Pressure Creativity
You make creative choices — which colors? what shading? — without the anxiety of a blank page. The design gives you structure while still allowing personal expression.
Genuinely Useful for Winding Down
Research shows coloring engages your brain just enough to quiet racing thoughts without feeling overwhelming. The repetitive motion gives your hands something purposeful to do while your mind settles — which is more useful than it sounds after a stressful day.
Coloring isn’t relaxing for every person in every moment. If you try it and feel frustrated rather than calm, that’s useful information — it might mean you’ve chosen a design that’s too complex for right now, or you’re putting too much pressure on the outcome. The technique sections below help you identify and fix the common culprits.
What Adult Coloring Isn’t
It’s not kids’ coloring with more lines. Adult coloring books feature complex designs, sophisticated themes, and quality paper. The community is supportive adults who take their hobby seriously.
It’s not art therapy (though it can be therapeutic). Don’t expect it to cure anxiety or depression, but many colorists find it genuinely useful for winding down — not as a cure for anything, but as a reliable way to shift gears at the end of the day.
It’s not expensive or complicated to start. Despite what art supply stores might suggest, you don’t need hundreds of dollars in supplies or advanced techniques to enjoy coloring.
What You Actually Need: The 3 Essentials Explained
The 3 essentials for starting adult coloring are one beginner-friendly coloring book, a 24–36 count set of colored pencils, and a good handheld sharpener — together costing $20–30.
Based on my experiences as a beginner and from research across beginner communities and what new colorists report worked versus frustrated them, here’s what to buy first.

Essential #1: One Beginner-Friendly Coloring Book
Your first book determines whether coloring feels relaxing or stressful. Buy the wrong one — too intricate, bad paper quality, themes you don’t enjoy — and you’ll get frustrated before developing any skill.
✓ What to Look For
- Simple to moderate designs — tiny spaces frustrate beginners still learning pencil control
- Single-sided pages — prevents bleed-through and lets you remove or frame favourites
- Themes you genuinely like — you won’t color designs that bore you, no matter how popular the book is
⚠ Common Mistakes
- Buying the most complex book because it looks impressive — those tiny spaces frustrate when you’re learning control
- Choosing based on others’ recommendations instead of personal taste — if you hate the designs, you won’t color
Budget guideline: $8–12 for quality beginner books.
→ See beginner-friendly book picks belowEssential #2: One Set of 24–36 Budget-Friendly Colored Pencils
Why not more colors or expensive pencils?
Beginners don’t yet know whether they prefer soft or hard pencil cores, which colors they’ll actually use regularly (probably 20–30 max), or if they’ll color long-term enough to justify expensive supplies. Starting with budget-friendly student-grade pencils ($8–15 for 24–36 colors) lets you learn what matters before investing $50–200 in professional sets.
What makes a good beginner set:
- 24–36 colors total — Enough variety without overwhelming choice.
- Basic color range — Primary colors, black, white/cream, earth tones, brights. Student sets typically include this balanced range.
- Wax-based student grade — Crayola, Cra-Z-Art, and Staedtler Noris Club: affordable ($8–15), durable, available everywhere, and good enough to learn technique.
- Pre-sharpened — One less thing to figure out on day one.
Why professional pencils can wait:
Professional pencils (Prismacolor Premier, Faber-Castell Polychromos, Caran d’Ache) offer softer cores, richer pigment, smoother blending, and more color options — but cost $50–200+ for comparable counts. Until you’ve colored regularly and identified specific frustrations, you’re guessing at what features you want. Start cheap, learn your preferences, upgrade strategically later.
Budget guideline: $8–15 for quality beginner sets
→ See beginner-friendly pencil picks belowEssential #3: One Good Handheld Sharpener
A bad sharpener breaks pencil tips constantly, creates uneven points, and wastes pencils. A good sharpener ($3–8) makes coloring dramatically more enjoyable — and a bad one is genuinely frustrating on day one.
✓ What to Look For
- Dual-blade barrel sharpener — sharpens wood casing and pencil core separately for even, long-lasting points
- OR quality single-blade handheld — replaceable blade, sturdy metal construction, not cheap plastic
- Built-in shavings compartment — keeps your workspace clean and interruption-free
⚠ What to Avoid
- Cheap plastic school sharpeners — break tips frequently, frustrating on day one
- Electric sharpeners for beginners — over-sharpen and waste pencils faster than you’d expect
- Sharpeners without a shavings compartment — create mess and interrupt the calm of a session
Budget guideline: $3–8 for quality sharpeners
→ See beginner-friendly accessory picks belowWhat You Can Safely Ignore as a Beginner
As a beginner, you can safely skip alcohol markers, blending stumps, professional-grade pencils, and large 100+ color sets — none of these help you learn or enjoy coloring any sooner, and most colorists never end up needing all of them.
These supplies are popular in the coloring community but don’t help beginners learn or enjoy coloring more. Save your money until you understand what you actually want.
Supplies That Can Wait
Alcohol markers and brush pens
Beautiful effects but harder to control than pencils. They bleed through many coloring books, require specific paper, and cost more. Master pencils first, add markers later if interested.
Blending stumps and solvents
Advanced blending techniques you’ll appreciate after you’ve learned basic layering with pencils. Not necessary for enjoying coloring as a beginner.
Huge pencil sets (100+ colors)
Research shows most colorists use 20–30 colors regularly regardless of how many they own. Buy what you need, add specific colors as projects require them.
Professional-grade pencils
Prismacolor Premier, Faber-Castell Polychromos, Caran d’Ache Luminance are amazing — but beginners can’t yet appreciate the differences that justify the $50–200 price premium.
Fixative spray
Preserves finished pieces but only needed if you’re framing or gifting work. Most beginners keep colored pages in books or folders.
Expensive paper or art pads
Coloring book paper works perfectly for beginners. Specialty paper matters only when you know exactly what effects you want to achieve.
Your First Coloring Session: Step-by-Step
Your first coloring session needs just four things: decent lighting, comfortable seating, your three essentials within reach, and a page you like but aren’t emotionally attached to — the actual technique matters less than most beginners expect.
You have your three essentials. Now what? Here’s how to set up and complete your first relaxing coloring session.
Setting Up Your Space
You Need:
- Good lighting (natural light or bright white lamp)
- Comfortable seating with back support
- Flat surface for your book
- Your three essentials within reach
You Don’t Need:
- A dedicated art studio
- A perfect ergonomic setup
- A fancy drafting table
- Any special equipment at all
Choosing Your First Page
Don’t start on your favourite page in the book. Flip to a design near the back or middle that you like but aren’t in love with. Use this as your practice page for pressure, color choices, and staying within lines.
This takes the pressure off and lets you experiment without fear of “ruining” your favourite design. Every coloring session after that first one will feel easier — because you’ve already made your mistakes somewhere safe.
Best first pages: simple geometric patterns, mandalas (circular, symmetrical designs) with clear distinct sections, nature scenes with larger spaces, any design with 10–20 areas to color rather than 100+ tiny details.
Skip for your first session: the most intricate page in the book, anything with text to color around, designs requiring gradients or complex shading.
Simple First-Session Technique
Pick 3–5 Colors
Don’t overthink it — if you like how they look next to each other in the pencil case, they’ll probably work on the page. Safe beginner combinations: blues and greens, warm colors (reds/oranges/yellows), cool colors (blues/purples/greens), or monochrome shades of one color.
Start Light
Color one section with light pressure, moving the pencil in one consistent direction — not scribbling. It’s normal for budget pencils to look a bit streaky on first pass. You can layer more color over it.
Build Up Color
Go over the same area 2–3 times with light pressure. This creates smoother, more vibrant color than one heavy pass — and it’s much easier to control.
Add More Sections
Color additional sections and see how the colors look together. If you love it, keep going. If not, try different combinations on other parts of the page.
Stop When You Feel Like It
There’s no rule that you must finish a page in one session. Some pages take 15 minutes, others take hours across multiple sessions. Stop whenever you feel satisfied or ready for a break.
What “Good Enough” Looks Like
Your first page won’t look like photos you see in coloring communities. Those colorists have practiced for months or years, often with professional supplies and advanced techniques.
Your first page might have: some streaky areas (normal with budget pencils), uncertain color choices (you’re learning combinations), coloring outside lines occasionally (totally fine), uneven coverage (technique develops with practice).
When to Upgrade: Growing Your Supplies
Most beginners are ready to upgrade specific supplies after 1–2 weeks of regular coloring, once they know whether they prefer soft or hard pencil cores and which colors they actually reach for.
After your first few coloring sessions, you’ll start to understand what matters to you. Here’s how to expand strategically without wasting money.
A Staged Approach to Expanding
Try a different coloring medium — Water-based markers or fineliners let you see whether you prefer bold, quick color over the softer blending of pencils. Check your coloring book’s paper weight first: thinner pages (under 90 gsm) can bleed through with markers, so test on a spare page before committing to a full design.
→ See marker & fineliner picks belowAdd a simple pencil case ($5–10) — Protects pencils from breaking and keeps them organised. A basic zipper pouch or pencil roll works perfectly.
→ See storage & organisation picks belowDon’t upgrade pencils just because others recommend it. Only consider it if you have a specific complaint:
- “My colors aren’t vibrant enough” → Try mid-range pencils with softer, more pigmented cores — see our Colored Pencils guide for comparisons (Prismacolor Premier, Faber-Castell, and others)
- “Tips break constantly even with a good sharpener” → Try quality pencils with better core durability — or if it’s the sharpener itself that’s the problem, see our Accessories guide for sharpener recommendations
- “I can’t blend colors smoothly” → Soft-core pencils blend more easily than hard student-grade — or learn the basics of blending, backgrounds, and color combinations in our Techniques hub
If you’re happy with your current pencils, spend that money on more coloring books or try water-based markers or fine-tip markers instead.
- Buy individual pencils in colors you actually use frequently — not huge sets with colors you’ll never touch
- Try new mediums based on techniques you want to learn (markers for bold backgrounds, gel pens for fine details)
- Invest in storage and organisation for your growing collection
- Explore specialty coloring books — artist-created, themed series, specialty paper
Signs you’re ready to upgrade:
- ✓ You color multiple times per week consistently
- ✓ You’ve identified specific limitations in your current supplies
- ✓ You have budget for quality supplies ($50–100+)
Frequently Asked Questions
Based on questions beginners ask in coloring communities, here are the answers you need.
Buy one coloring book with simple designs and thick paper (90+ gsm, single-sided pages), one set of 24–36 colored pencils from any budget brand (Crayola, Staedtler, Cra-Z-Art), and one quality handheld sharpener. Total: $20–30. Choose a simple page near the back of your book to practice, pick 3–5 colors you like together, and start coloring with light pressure. This minimal setup gives you everything needed to discover whether you enjoy coloring before investing more.
Cheap (budget-friendly) colored pencils like Crayola, Cra-Z-Art, or Staedtler Noris Club work perfectly for beginners. They cost $8–15 for 24–36 colors and let you learn technique, color choices, and pressure control. Expensive professional pencils ($50–200+) offer smoother blending and richer colors, but you can’t appreciate these features until you’ve practiced with budget pencils and identified what frustrates you. Start cheap, upgrade strategically later.
Buy a 24–36 color set. This gives you enough variety — primary colors, secondaries, earth tones, brights, and darks — to create interesting combinations without overwhelming choice. Research shows most colorists use 20–30 colors regularly regardless of collection size. Avoid 12-color sets (too limiting) and 100+ sets (wasteful for beginners who don’t yet know which colors they’ll actually use). Add individual colors later as specific projects require them.
Look for coloring books with 90+ gsm paper (grams per square meter) and single-sided printing. Check reviews or product descriptions mentioning “thick paper,” “no bleed-through,” or “marker-friendly.” Many popular adult coloring books feature 80–100 gsm paper suitable for light marker use. For heavy marker use, consider specialty marker pads with 120+ gsm paper. Single-sided pages prevent ruining the back design even if slight bleed occurs.
Start with colored pencils. They’re the most forgiving for beginners — easy to control, work on most paper types, mistakes can be erased or blended, and pressure control develops naturally through use. Markers require understanding bleed-through and blending windows. Gel pens work best as accents, not a primary medium. Once you’re comfortable with colored pencil basics (after 2–4 weeks), add gel pens for highlights or experiment with markers if you want bolder color.
Budget $20–30 total: coloring book with simple designs and thick paper ($8–12), one set of 24–36 colored pencils from budget brands ($8–15), and one quality handheld sharpener ($3–8). This gives you everything needed for 1–3 months of regular coloring. If you enjoy it, budget another $10–20 for a marker or fineliner set, second book, and simple pencil case. Avoid spending $50+ until you know you’ll color regularly.
Paper thickness of 90+ gsm (grams per square meter) prevents most bleeding issues. Colored pencils rarely bleed even on thinner paper. Water-based markers need 90+ gsm minimum. Alcohol markers need 100+ gsm or specialty marker paper (120+ gsm). For practice, standard coloring book paper (80–100 gsm) works fine with colored pencils. Place a sheet of cardstock under your working page as extra protection while learning pressure control.
Choose comfortable seating with back support in a quiet spot. Set up good lighting — natural light near a window or a bright white lamp. Place your coloring book flat on a table or clipboard. Keep your colored pencils within easy reach in their case or a cup. Choose a simple design from the middle or back of your book (save favourites for later). That’s it — no special equipment needed.
Yes — student-grade pencils from sets like Crayola, Cra-Z-Art, or Staedtler Noris Club are exactly what this guide recommends for beginners. They’re built for this price point and they work. The main limitation is blending smoothness, which you won’t notice or care about until you’ve been coloring for a while. If you already own a basic set, start with those before buying anything new.
Essential Products for Beginning Adult Coloring
Now that you understand what beginners need and why these specific supplies matter, here are researched product recommendations to help you start confidently.
The product recommendations in this guide are based on research synthesis from adult coloring communities (Reddit’s adult coloring community, Facebook coloring groups), beginner feedback across blog comments and reviews, and manufacturer specifications for student-grade versus professional supplies. I’ve also drawn on my own experience — the hours I spent as a beginner working out what actually helped and what turned out to be a waste of time and money.
Category 1: Beginner-Friendly Adult Coloring Books
Beginner-friendly coloring books feature simple to moderate designs, single-sided pages, and thick paper (90+ gsm). They offer themes that appeal to adult interests without overwhelming detail that frustrates new colorists.
- Simple designs reduce anxiety about “ruining” complex pages
- Single-sided pages let you remove or frame favourites
- Diverse themes (mandalas, nature, patterns) help you discover your preferences
Pick a theme you genuinely enjoy. Ensure designs have 10–20 distinct areas to color. Check reviews mentioning “thick paper” and “beginner-friendly.”
-
 View on Amazon$7.99
We earn commission if you make a purchase at no additional cost to you. See Disclosure Statement for further details....
09/23/2026 01:40 pm GMT

Category 2: Beginner-Friendly Colored Pencil Sets
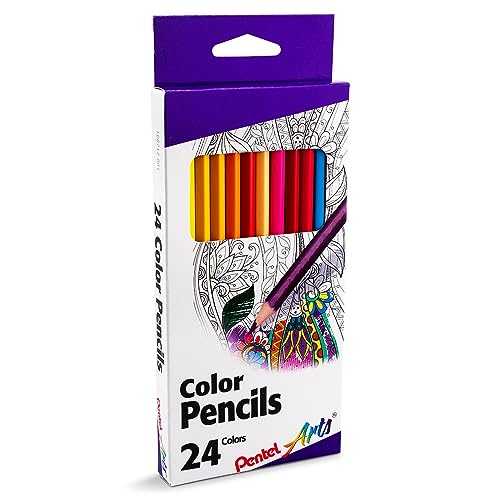
Student-grade colored pencils in the $8–15 range provide everything beginners need: enough color variety (24–36 shades), basic blending capability, and durability for learning technique. They let you discover what matters to you before investing $50–200 in professional sets.
- Affordable enough to start immediately without financial stress
- Include balanced color ranges (primaries, earth tones, brights, darks)
- Good enough to learn technique — and affordable enough to replace without guilt
Look for sets with 24–36 colors, wax-based formulation, pre-sharpened, sturdy packaging. Crayola, Cra-Z-Art, and Staedtler Noris Club all work well.
-
View on Amazon$5.29
We earn commission if you make a purchase at no additional cost to you. See Disclosure Statement for further details....
09/23/2026 01:40 pm GMT -
View on Amazon$12.49
We earn commission if you make a purchase at no additional cost to you. See Disclosure Statement for further details....
09/23/2026 03:40 pm GMT -
View on Amazon
$43.99$40.05We earn commission if you make a purchase at no additional cost to you. See Disclosure Statement for further details....
09/23/2026 12:46 pm GMT


Category 3: Beginner Accessories for Starting Out
Good accessories make coloring more enjoyable and protect your supplies. A quality sharpener prevents frustration from broken tips.
- Quality sharpeners create even points without breaking cores
- Small investments ($3–8 each) that dramatically improve the experience
Start with just a good sharpener — dual-blade or quality handheld with replaceable blade. Add a soft eraser after a few sessions if you want to lighten areas.
-
View on Amazon$4.19
We earn commission if you make a purchase at no additional cost to you. See Disclosure Statement for further details....
09/23/2026 01:40 pm GMT

Category 4: Budget-Friendly Markers or Fine-Tip Pens for Beginners
Water-based markers create bold, vibrant color in large areas quickly. Fine-tip pens (sometimes called fineliners) add precise outlines, details, and patterns. Both expand your creative options once you’re comfortable with basic pencil techniques.
- Water-based formulas work in most coloring books (less bleed than alcohol markers)
- Budget sets ($10–20) let you experiment before investing in premium markers
Wait until you’ve colored regularly with pencils for 2–4 weeks before adding markers. Start with water-based sets; save alcohol markers for later.
GSM stands for grams per square meter — the standard measure of paper thickness. Find it in the product description online, or on the book’s back cover or inside front page.
Quick reference: 70–80 gsm = standard printer paper (too thin for heavy coloring). 90–100 gsm = quality coloring book range — handles pencils and light markers well. 120+ gsm = marker-specific paper, needed only if you use alcohol markers.
If the listing doesn’t mention gsm, search the book title plus “paper weight” or “bleed through” in reviews before buying.
-
View on Amazon
$6.00$4.49We earn commission if you make a purchase at no additional cost to you. See Disclosure Statement for further details....
09/23/2026 01:40 pm GMT

Category 5: Simple Storage and Organisation
After a few weeks of coloring, you’ll accumulate pencils, markers, gel pens, and accessories. Simple storage keeps supplies protected, organised, and portable — and makes sessions more relaxing because everything is in one place.
- Pencil cases prevent broken tips from dropping or crushing
- Rolls and pouches make coloring portable — color anywhere
After your first 2–4 weeks, start with a simple pencil case or roll ($5–10). Upgrade to larger storage systems only when your collection outgrows basic solutions.
-
View on Amazon$4.99
We earn commission if you make a purchase at no additional cost to you. See Disclosure Statement for further details....
09/23/2026 09:42 am GMT

What’s Next: Growing as a Colorist
Once you’ve completed a few pages and know you enjoy coloring, here’s how to develop your skills and expand your hobby.
Technique Progression for Beginners
- Weeks 1–2: Consistent pressure and directional strokes, staying within lines (or intentionally breaking them), completing simple designs.
- Weeks 3–4: Using lighter and darker shades of the same color, creating depth by darkening edges, adding highlights with lighter colors.
- Months 2–3: Blending two similar colors where they meet, creating smooth transitions, layering for richer colors.
- Months 3–6: Explore specialized techniques — basic shading, color layering, simple color combinations.
Techniques to Explore Next
Basic Shading and Dimension Once you’re comfortable filling spaces with color, learn to add simple shading to create depth. Lighter and darker versions of the same color make pages look three-dimensional instead of flat. Simple Color Combinations Move beyond guessing which colors work together. Understand basic color relationships that always look harmonious and create palettes you can use confidently in any design. Layering for Richer Colors Building up color in multiple light layers creates smoother, more vibrant results than a single heavy pass. This fundamental technique improves every page you color. Organising Your Collection with Color Charts As your supplies expand, color charts help you see every pencil at a glance, plan palettes before you start, and keep your growing collection organised.Choosing Better Supplies When You’re Ready
Understanding Colored Pencil Quality Levels When you’re ready to upgrade from beginner pencils, learn what features justify price increases and which matter for your coloring style. Browse All Coloring Book Reviews Ready to choose your second or third book? See reviews of specific titles across categories — mandalas, nature, abstract, and more. Color Comfortably for Longer — Your Guide to Pain-Free, Stress-Free Adult Coloring If you’re starting to color for longer sessions, this guide covers eye strain, hand comfort, posture, and workspace setup to keep coloring enjoyable.Find Your Community
The adult coloring community is genuinely supportive and non-judgmental — here’s where beginners feel most welcome, including right here on TCI’s own pages:
Reddit: r/Coloringbookspastime An active community sharing finished pages, asking questions, and offering encouragement. Great for supply recommendations and troubleshooting technique questions. Facebook: The Coloring Inn Follow our page for new guides, supply tips, and updates as we publish — a friendly, low-pressure way to stay in the loop. Instagram: @thecoloringinn Coloring inspiration, supply highlights, and behind-the-scenes glimpses. Enjoy the inspiration without comparing your beginning work to experienced colorists. Pinterest: The Coloring Inn Save our guides and inspiration boards for later — handy for planning your next book, technique, or supply upgrade.Your coloring style, color choices, and finished pages don’t have to look like anyone else’s. The goal is personal enjoyment and relaxation — not perfection or approval. Color in whatever way makes you happy.
You now understand exactly what you need to begin: one beginner-friendly coloring book, one set of 24–36 budget-friendly colored pencils, and one good handheld sharpener. Total investment: $20–30. No overwhelm, no wasted money, no anxiety about “doing it wrong.”
Remember: there’s no “wrong” way to color. Your pages don’t need to look like anyone else’s. Color with whatever colors make you happy, use whatever techniques feel comfortable, and enjoy the relaxing process of bringing pre-printed designs to life with your creative choices.
Ready to learn your first technique? Check out our Tips and Techniques section for simple tutorials on basic shading, color layering, and choosing harmonious color combinations.
Looking for specific supply recommendations? Browse the product guides above for researched options at every budget level.
Happy coloring — enjoy your first relaxing session!