Master this Signature Technique in 4 Easy Steps

Create stunning underwater scenes and magical bubble effects with this simple coloring technique. Perfect for beginners!
INTRODUCTION
Have you seen those pictures where other colorists have added really cool details to their pictures like bubbles? Ever wondered how they do it or how you can add some really cool bubbles to your own ocean, sea creatures or underwater adult coloring pictures?
It looks like it might be hard. Actually once you know how, it’s really easy!
As a beginner you may have avoided using bubble details because:
- Intimidated by the shading required;
- Don't know which tools create the "shine" effect;
- Lack confidence blending multiple colors;
- Afraid you will ruin your artwork
The good news? This 4 step process eliminates all those worries.
I learned how to color bubbles from another colorist, Selina Gascoigne, who posted a step-by-step tutorial on a Facebook group I'm a member of, Coloring Books for Adults. I was blown away by how easy her technique was and just how brilliant the bubbles looked. Once this small white highlight detail has been added to your circles, they magically look like real bubbles!
What You'll Learn:
- The basic 4-step bubble coloring technique
- Which coloring tools work best for bubbles
- Common mistakes and how to avoid them
- Creative ways to use bubbles in your coloring projects
Whether you're adding bubbles to an ocean scene, creating a magical fairy background, or just want to try something new, this technique will add that extra "wow" factor to your coloring.
Beginner's Tools & Materials
Beginners Kit:
- White or cream colored pencil OR burnisher pencil (for bubble outlines)
- Colored pencils for highlights (pink, mauve, grey, silver, blue, aqua, turquoise, white, cream)
- Colorless
Blender Pencil - Soft pastel chalk or eyeshadow in blue and/or green tones (for background)
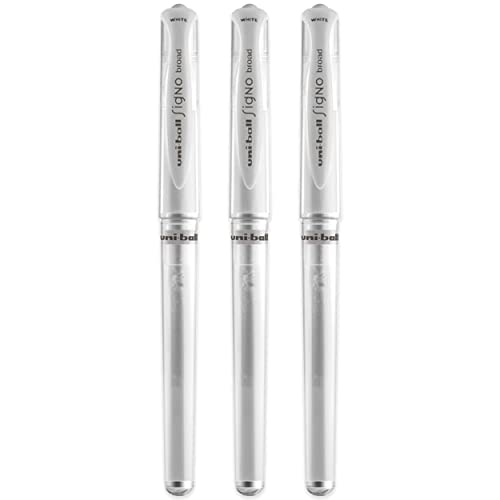
- White gel pen for final highlights (uni-ball Signo broad or similar)
- Cotton pads (for applying soft pastel background)
- Quality Pencil Sharpener (for maintaining sharp points)
- Your coloring page with space for bubbles
-
 Buy Now on Amazon
$13.60$11.90We earn commission if you make a purchase at no additional cost to you. See Disclosure Statement for further details....
04/02/2026 05:00 am GMT -
 Buy Now on Amazon$19.99
We earn commission if you make a purchase at no additional cost to you. See Disclosure Statement for further details....
04/02/2026 05:00 am GMT -
 Buy Now on Amazon$11.54
We earn commission if you make a purchase at no additional cost to you. See Disclosure Statement for further details....
04/02/2026 05:01 am GMT -
 Buy Now on Amazon
$14.00$11.96We earn commission if you make a purchase at no additional cost to you. See Disclosure Statement for further details....
04/02/2026 05:01 am GMT -
 Buy Now on Amazon$6.40
We earn commission if you make a purchase at no additional cost to you. See Disclosure Statement for further details....
04/02/2026 05:01 am GMT -

$35.99$23.24View on Amazon- Ergonomic Efficiency: Reduces hand and wrist strain for frequent users by replacing manual twisting with a fast, powerful motor.
- Pencil Preservation: Features an auto-stop function and breakage-prevention technology to extend the life of expensive colored pencils.
- Versatile Performance: Provides a quiet, high-speed sharpening experience with the flexibility of both plug-in and battery power options.
- Reliable Power: Delivers enough torque to sharpen hard-core pencils quickly and consistently without stalling.
We earn commission if you make a purchase at no additional cost to you. See Disclosure Statement for further details....
04/02/2026 05:07 am GMT
Check out our Best Tools for Coloring Bubbles below to see specific product links and alternatives.
Worried about blending mistakes? See my section below Troubleshooting
The 4 STEP Technique For Bubble Magic
Forget the complex physics, coloring bubbles is just about smart layering to produce some magic. I'll walk you through each step using the exact method that works beautifully for underwater scenes.
Step 1: Create the Bubble Outlines
The first step is creating your bubble shapes using a white or cream colored pencil or a burnisher pencil. This creates a waxy resist on the paper.
I am using:
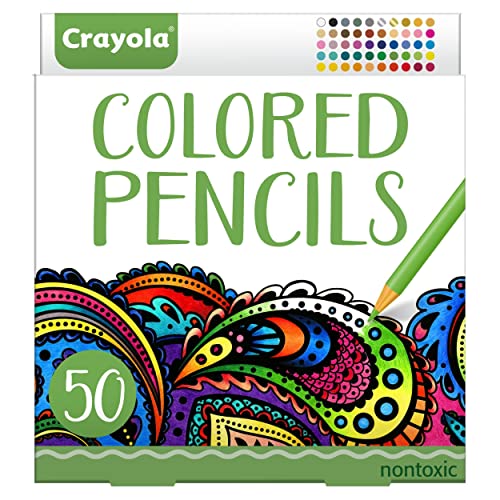
- Crayola Colored Pencils in Sand and White;
- Derwent Burnisher Pencil; and
- Prismacolor Premier Colourless Blending Pencil.
What to Do:
Draw circles of different sizes wherever you want bubbles to appear. Important: Make sure the outlines are fairly thick lines. This lays down a waxy resist onto the paper so that when you apply your soft pastel or eyeshadow background in the next step, the circles stand out clearly.
Pro Tip: Vary your circle sizes with some tiny, some medium, a few larger ones. Real bubbles come in different sizes, and this natural variation makes your scene more realistic.
Why This Works:
The thick outline creates a "resist" layer so that when you apply pastels over this, they won't stick to the pencil line, keeping your bubble defined and realistic.

Draw thick circle outlines with white or cream colored pencil to create a waxy resist
Pencil broke while drawing outlines? Try a burnisher or blending pencil with a softer core rather than a regular pencil.
Step 2: Add the Background Color
Now comes the fun part! Adding your water or magical background color using soft pastels or eyeshadow.
I use Mont Marte Soft Pastel in a sea green color. Apply the soft pastel to a cotton pad, then rub the cotton pad over your bubble outlines. You'll see the magic happen! Your bubble outlines stand out clearly against the background because of the waxy resist you created in Step 1!
The cotton pad is ideal here because its soft texture allows you to apply the soft pastel pigment in even, circular motions. This avoids streakiness and maintains a soft look.
Alternative: You can also use eyeshadow instead of soft pastels. Blue and green eyeshadows work great for water scenes. The application method is the same. Use a cotton pad or makeup applicator.

Apply soft pastel or eyeshadow background with a cotton pad. Bubble outlines stand out through the waxy resist
You might notice that the Prismacolor Premier Colorless Blender outlines show less contrast than the white or cream pencils. This is normal ! They'll still work for the technique, just with a subtler effect.
Background Color Tips:
- For ocean/underwater scenes: Blues and sea greens
- For magical scenes: Purples, pinks, soft blues
- For beverage scenes: Browns (for soda/beer), golds (for champagne)
- Application trick: Use circular motions with your cotton pad for even coverage
Step 3: Add Shadows to the Bubbles
This is where your bubbles start gaining depth and dimension! You'll add shadow colors both inside and outside each bubble.
Shadow Placement
Achieving realistic, three-dimensional bubbles depends entirely on a consistent light source. If the light hits every bubble from the same direction, your entire coloring page will "pop" into 3D.
Instead of just guessing the shadow side, try this simple experiment to lock in your light source before you begin coloring:
- Find Your Direction: Place a clear drinking glass on a piece of white paper. Stand a pen or pencil upright inside the glass.
- Establish the Light: Shine a single, strong light source (like a desk lamp or the flashlight on your phone) onto the glass and pen.
- Check the Shadow: Look at the shadow cast by the pen.
- Not happy with the shadow direction? Move the light source, not the glass, until the shadow falls exactly where you want it (e.g., lower-right, lower-left).
- Lock in the Angle: The angle you choose now is your consistent light source. If the pen's shadow points to the bottom-right, then the light is coming from the top-left. Draw a line along the shadow to lock in the angle. Use that shadow line to ensure all your shadows are in the same place on your bubbles.
Apply the Angle to Your Bubbles
Once you've locked in your light source:
- The Highlight (Shine): The brightest highlight (where you use your White Gel Pen) must be placed on the bubble's surface closest to your chosen light source.
- The Shadow (Depth): The crescent-shaped shadow inside the bubble (colored with darker pencils) must be placed on the bubble's surface farthest from the light source.
Remember: Every single bubble on your page must follow this exact same shadow and highlight placement for maximum realism.
Shadow Placement Guide Summary:
- Decide where your light source is (I use upper left)
- Inside shadows go on the opposite side (lower left)
- Outside shadows go below or beside the bubble on the light side
- Keep shadows consistent across all bubbles for realistic lighting
Inside shadows (creates roundness):
Pick one side of your bubble to be the shadow side. I usually choose the left side. Using colored pencils, draw a crescent moon shape along the inside edge of your bubble on the shadow side.
For my Crayola white bubbles, I used:
- Crayola Mauve for the crescent moon shape
- Crayola Silver directly below the mauve to fill in more of the circle
For Derwent burnisher bubbles, I used:
- Crayola Pink and Mauve for inside shadows
For Prismacolor Colorless Blender bubbles, I used:
- Crayola Mauve and Silver for inside shadows
Outside shadows (creates depth and placement):
To make bubbles look like they're floating in space, add a shadow underneath or beside them. Draw a thick line along the outside edge on the opposite side from where your light is hitting.
For Crayola bubbles: Crayola Cerulean along the outside right edge
For Derwent bubbles: Crayola Turquoise for the outside shadow
For Prismacolor bubbles: Crayola Cool Grey for outside shadows

Add colored pencil shadows inside (moon shape) and outside (thick line) each bubble for dimension
- Shadow too thick inside: Keep it a crescent, not covering half the bubble
- Inconsistent shadow direction: Pick one light source and stick with it
- Shadow colors too dark: Use medium-toned colors, not black
Step 4: Add Shine to the Bubbles
This is the magic step! A dash of the white gel pen instantly transforms a flat circle into a shimmering sphere.
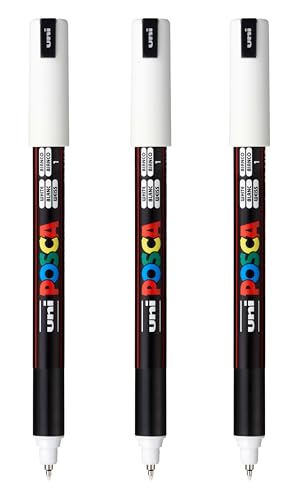
Use a white uni-ball Signo gel pen (broad tip) for this or a White Acrylic Paint Pens (They do similar things). My favorite brand and size of pen is Posca PC-1MR 0.7mm in White. Inside each bubble, towards the top on the light side (opposite your shadows), draw:
- A longer curved white line
- A small white dot beside it
That's it! Once this small white highlight detail has been added to your circles, they magically look like real bubbles!

Add curved white gel pen highlight and small dot. This creates the realistic bubble shine!
Highlight Placement:
- Goes on the opposite side from your inside shadow
- If shadow is lower left, highlight is upper right
- The curved line should follow the bubble's edge curve
- The small dot goes right next to the curved line
Why This Works
Real bubbles reflect light in a specific pattern. That curved highlight with the small dot beside it mimics how light bounces off a transparent sphere. It's the visual cue our brains recognize as "shiny bubble!"
Comparing These Different Color Combinations
I used these products to create the technique pictures above.
Crayola Colored Bubbles
- I used Sand, White, Mauve, Silver and Cerulean.
- They are a great product for beginners as they are affordable and forgiving. You can use these to learn the technique without expensive materials.
- I love how these look! The cream and white outlines create clear, defined bubbles with a slightly frosted appearance. Perfect for ocean scenes. The sand color is warmer than the white and is great for coloring bubbles in sunset toned water.
Derwent Pencils
- I used Pink, Mauve, Turquoise.
- Derwent pencils are the best all round professional quality pencils. They provide smooth blending with excellent color vibrancy.
- They create a very strong resist and clear outlines. Excellent if you want your bubbles to really pop against the background.
Prismacolor Premier with Blending
- I used Mauve, Silver, Cool Grey, Colorless Blender
- These pencils produce realistic, 3D water droplet effects
- I love the effect created by these. To me, they look like water droplets rather than air bubbles. On a green background they look like dew drops on a leaf! More subtle than the white outlines but very realistic.
My Recommendation:
Why don't you experiment with this basic technique using the above guidelines and try different background and shadow colors? I know I will be experimenting with them further in my own coloring.
Start with Crayola white or cream pencils if you're just beginning. They're affordable and create beautiful results. Once you're comfortable with the technique, try the colorless blender for that water droplet effect!
Frequently Asked Questions
These are the most common questions adult colorists ask about creating realistic bubble effects in their coloring books. Whether you're struggling with smooth blending, bright highlights, or making your bubbles look three-dimensional, these answers will help you achieve professional-looking results.
Colorless blenders work best for smooth results in coloring books. Prismacolor and Lyra blenders are popular choices among adult colorists. For budget-friendly options, blending stumps smooth out pencil strokes effectively. Apply blender after every 2-3 pencil layers for best results. See blending tools.
Layer light pressure pencil strokes, building up 6-8 layers minimum. Use circular or back-and-forth motions, changing direction with each layer. A colorless blender or blending stump smooths out remaining streaks. Quality pencils like Prismacolor or Faber-Castell blend easier than budget brands, but any pencils can blend with patience. See blending tools.
Patchy shading usually comes from pressing too hard or not layering enough. Try lighter pressure with more layers, at least 6-8 layers for smooth spheres. A colorless blender helps fuse the layers together. Also check your pencil quality: cheaper pencils often contain less wax, making smooth blending nearly impossible. See blending tools.
Uni-Ball Signo White Gel Pens work best over colored pencils and markers in coloring books. For even brighter highlights, white acrylic paint pens like Posca offer superior opacity. White gel pens can skip on wax-based pencils, so clean the tip regularly. Apply highlights last for crisp, glossy effects. See white pens for coloring.
White gel pens struggle with wax-based colored pencils because the wax clogs the pen tip. Switch to white acrylic paint pens like Posca or Deleter Neopiko for better opacity over waxy surfaces. If using gel pens, apply highlights before heavy pencil layers, or use multiple thin layers. Clean your pen tip frequently. See white gel pens.
White gel pens create crisper, brighter highlights than white pencils in coloring books. Use gel pens like Uni-Ball Signo for sharp details like bubbles or eye sparkles. White pencils work better for soft, subtle highlights or blending. For maximum brightness over dark colors, white acrylic paint pens outperform both. See white gel pens.
Add depth by going much darker in shadow areas than feels comfortable, at least 4-5 shades darker than your mid-tone. Use white gel pens or paint pens for bright highlights on the opposite side. The bigger the contrast between shadows and highlights, the more 3D your coloring appears. Blend shadow edges with a colorless blender.
Shadows should be at least 4-5 shades darker than your mid-tone color. If your bubble's main color is light blue, the shadow edge should be deep navy or near-black. This extreme contrast creates the rounded, three-dimensional look. Blend the transition between light and dark areas with a colorless blender or stump for smooth gradients.
Glossy bubbles need strong contrast between highlights and shadows. Use your darkest shade where the bubble is in shadow, then add bright white gel pen highlights where light reflects. The bigger the contrast, the glossier it looks. A colorless blender can also create a polished surface sheen by smoothing your colored pencil layers.
Vary your bubble sizes! Have some tiny bubbles, some medium, and a few larger ones. Overlap some bubbles to create clusters. This natural variation makes them look more realistic.
Take breaks! Coloring detailed elements like lots of tiny bubbles can strain your hand. Check out our guide on health and safety considerations for tips on avoiding coloring-related discomfort.
Best Tools for Coloring Bubbles
The great thing about bubble effects is that you can create them with tools you probably already have. That said, certain tools make it easier and produce different effects. Here's what I've found works best after experimenting with this technique on dozens of coloring pages.
The trade-off is that they're slightly less dramatic than white pencil highlights, but they look more realistic and transparent. Great for when you want subtle, sophisticated bubbles.
Colored Pencils
These are my go-to tools for bubble highlights. The soft, chalky texture creates that perfect frosted bubble effect that looks so good in ocean scenes.
What I love about white colored pencils:
- Affordable and widely available
- Create soft, natural-looking highlights
- Crayola white and cream both work beautifully
- Easy to control pressure for different effects
- Great for beginners
How to choose: If you're just starting out, grab a Crayola white pencil. Seriously, the basic ones work great. I've also had good results with Prismacolor Premier White and Faber-Castell Polychromos White for when I want a slightly smoother application.
-
Buy Now on Amazon
$13.60$11.90We earn commission if you make a purchase at no additional cost to you. See Disclosure Statement for further details....
04/02/2026 05:00 am GMT -
 Buy Now on Amazon$74.97
We earn a commission if you make a purchase, at no additional cost to you. See Disclosure Statement.
-
 Buy Now on Amazon
$32.25$22.78We earn a commission if you make a purchase, at no additional cost to you. See Disclosure Statement.
04/02/2026 05:00 am GMT
Colorless Blenders
These create a completely different effect. Instead of adding white, they push your existing color around to create clear, glossy highlights.
Why try a colorless blender:
- Creates transparent, glass-like bubbles
- Looks like water droplets
- Perfect for "clear" bubble effects
- Works on any color background
- One tool creates highlights on any color
I love the effect created by the Prismacolor Premier Colorless Blender. To me, these bubbles look like water droplets. On a green background, they could look like dew drops on a leaf. On blue, they're perfect for underwater bubbles that look super realistic.
The trade-off is that they're slightly less dramatic than white pencil highlights, but they look more realistic and transparent. Great for when you want subtle, sophisticated bubbles.
-
 Buy Now on Amazon
$27.29$19.68We earn commission if you make a purchase at no additional cost to you. See Disclosure Statement for further details....
04/02/2026 02:01 am GMT -
 Buy Now on Amazon$7.99
We earn commission if you make a purchase at no additional cost to you. See Disclosure Statement for further details....
04/02/2026 05:04 am GMT -
 Buy Now on Amazon$21.11
We earn commission if you make a purchase at no additional cost to you. See Disclosure Statement for further details....
04/02/2026 03:01 am GMT
White Gel Pens or White Acrylic Paint Pens
When you want really tiny bubbles or super bright highlights, gel pens or acrylic paint gel pens are your friend. They create the most opaque, brightest white of any tool.
Best uses for white gel pens:
- Tiny bubble streams rising from fish or objects
- Adding extra sparkle to existing bubbles
- Bubbles in darker-colored backgrounds
- When you want maximum contrast
- Small details that colored pencils can't reach
My technique: I often use white gel pens or white acrylic paint pens to add a tiny second highlight to bubbles I've already created with colored pencil. Just a small dot inside the main highlight makes bubbles look extra glossy and dimensional.
Popular options: Sakura Gelly Roll White, Uni-ball Signo White, Posca PC-1MR 0.7mm in White, and Pentel Hybrid Gel Grip are all excellent. I keep several on hand because gel pens can dry out, and when you're in the zone coloring, you don't want to stop!
-
Buy Now on Amazon$6.40
We earn commission if you make a purchase at no additional cost to you. See Disclosure Statement for further details....
04/02/2026 05:01 am GMT -
 Buy Now on Amazon$14.99
We earn commission if you make a purchase at no additional cost to you. See Disclosure Statement for further details....
04/02/2026 05:00 am GMT
Background Coloring Tools
While this guide focuses on the bubble technique itself, you need good tools for coloring your background too. Whether you're creating an ocean, a magical sky, or a bubbly beverage, smooth background color makes your bubbles stand out.
What works well for bubble backgrounds:
Soft Pastels are an easy way to add soft, dreamy backgrounds without visible streaks. They blend effortlessly and cover large areas fast. Perfect for those misty, underwater vibes. Just swipe the pastel color onto a cotton pad and gently rub it over your bubble outlines. The wax resist from Step 1 makes your bubbles pop instantly. They can be a bit messy, but cleanup is quick and the payoff is gorgeous.
Eye Shadow works surprisingly well as a pastel alternative and you probably already have some on hand. Blues and greens are perfect for watery effects, while softer shades like lavender or pink can warm up a sky or sunset scene. Apply it with a cotton pad or makeup applicator in light, circular motions for a smooth, blended look. It’s a great low-cost option that still gives you that soft, luminous background.
Alcohol markers (like
Colored pencil sets are more budget-friendly and give you control over color intensity. For underwater scenes, look for sets with good blues and greens. Layer colors for depth. Start light and build up.
Blending stumps or tortillons help smooth out colored pencil backgrounds. After coloring your base, use these to blend and eliminate paper texture. Creates a more professional-looking background for your bubbles.
My recommendation: Start with what you have. The bubble technique works on any colored background. As you get more into coloring, you can upgrade your background tools to get even smoother results.
-
 Buy Now on Amazon$3.09
We earn a commission if you make a purchase, at no additional cost to you.
04/02/2026 05:01 am GMT -
Buy Now on Amazon$19.99
We earn commission if you make a purchase at no additional cost to you. See Disclosure Statement for further details....
04/02/2026 05:00 am GMT -
Buy Now on Amazon
$13.60$11.90We earn commission if you make a purchase at no additional cost to you. See Disclosure Statement for further details....
04/02/2026 05:00 am GMT -
 Buy Now on Amazon$114.99
We earn commission if you make a purchase at no additional cost to you. See Disclosure Statement for further details....
04/02/2026 04:02 am GMT
Mastering Other Coloring Techniques
Now that you've learned how to create bubbles, here are some other techniques that work beautifully with bubble effects:
How to Color Gems and Crystals
If you enjoyed learning the shadow-and-highlight technique for bubbles, you'll love coloring gemstones! The principle is similar. Strategic shadows and highlights create dimension and shine. Gems take it up a notch with multiple facets, but it's just as fun once you get the hang of it. Learn how to color realistic gems
Background Techniques for Coloring
Want to create the perfect ocean or magical scene for your bubbles? Our background techniques guide covers everything from smooth gradients to creating water effects. A well-colored background makes your bubbles really pop! Explore background coloring techniques
Blending Techniques
Smooth blending is key to creating professional-looking backgrounds for your bubble effects. Whether you're using colored pencils, markers, or a mix, good blending technique makes all the difference. Master blending techniques
Color Theory Basics
Choosing the right colors for your bubbles and backgrounds becomes easier when you understand color theory. Learn about complementary colors, cool vs warm tones, and how to create harmonious color schemes. Understand color theory for coloring
Want to Learn More?
I've covered my main 4-step technique, but learning from other talented colorists is essential. The challenge is the overwhelming number of resources available eg videos, blogs, and social groups. All of which takes precious time away from your busy job or family. To help, here are my initial learning resources.
Tutorials and Demonstrations
Link | Presenter | Overview |
|---|---|---|
Marjorie Sarnat | In this article Marjorie Sarnat gives a step by step guide, including pictures, on how to color a bubble. | |
Phantomgirl2510 | This is a quick 3 step guide on the Deviant Art website showing how to draw a simple bubble. | |
C is for Colorista | This article shows another way to color bubbles with colored pencils and an eraser. | |
Marianne Walker | In this article Marianne Walker describes and demonstrates how to draw air bubbles using alcohol markers. | |
Bridget McCarty | In this video Bridgett McCarty clearly explains and shows how to draw and color bubbles using Prismacolor color pencils. |
Join the Community
Remember how I mentioned learning this from Selina Gascoigne? Her original post was in the Coloring Books for Adults Facebook group.
The Coloring Books for Adults Facebook group is a fantastic community. Colorists share techniques, ask questions, show off finished pages, and support each other. It's free to join and there are thousands of members happy to help.
Other great communities include:
- Adult Coloring Enthusiasts (Facebook)
- r/Coloring on Reddit
- Coloring groups on Instagram (search #adultcoloring)
Coloring Books to Practice Bubbles
If you're looking for coloring books to practice drawing and coloring bubbles, then check out these suggestions with top global ratings from Amazon.
-
 Buy Now on Amazon
$18.00$9.19We earn commission if you make a purchase at no additional cost to you. See Disclosure Statement for further details....
04/02/2026 03:01 am GMT -
 Buy Now on Amazon
$9.99$8.68We earn commission if you make a purchase at no additional cost to you. See Disclosure Statement for further details....
04/02/2026 04:01 am GMT -
 Buy Now on Amazon
$15.99$14.90We earn commission if you make a purchase at no additional cost to you. See Disclosure Statement for further details....
04/02/2026 04:02 am GMT
You can find these on Amazon or in most bookstores with adult coloring sections.